
|
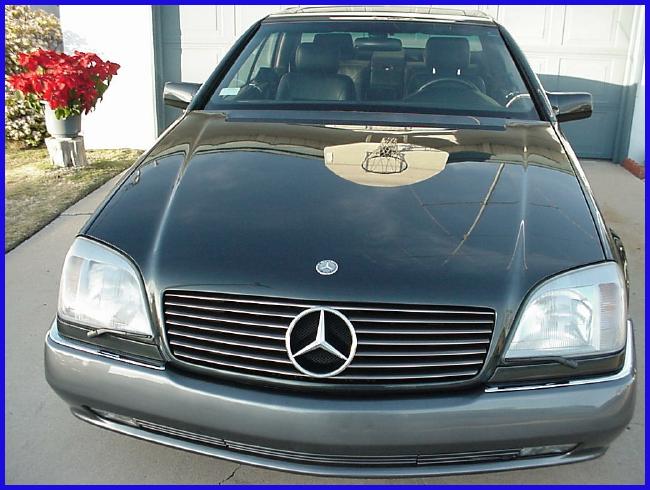
K6JRF's Page formerly W6FZC My Mercedes Benz S500 Coupe |
|
Analyze and Troubleshoot "Check Engine" MIL and Electronic Control Units (ECU)!
|
Coupe Headlights |
Adjusting S-Class Coupe Headlights Compared to the above procedure, aiming the lights on your coupe is a breeze. But you need to know what to look for, that's
why the previous section. You now know that the low beam should fall off 2.1 inches to the top of the beam at a distance
of 25 ft from the headlights.
Compared to the above procedure, aiming the lights on your coupe is a breeze. But you need to know what to look for, that's
why the previous section. You now know that the low beam should fall off 2.1 inches to the top of the beam at a distance
of 25 ft from the headlights.To adjust your Mercedes headlights, do the following (Need to do the same setup as in Manual Aiming section); Remove the cover above the headlight so you can see the 'bubble' level mounted just below the lamp. Turn the Vertical Adjustment Screw (VAS) [1] until the bubble in the level [6] is in the CENTER of the heavy middle line (shown in BLUE) and centered between the two outside lines (shown in RED). As you do this the pin indicator [8] next to the screw will move in or out depending on which way you need to turn the screw. |
 When the bubble is 'level', then turn the Horizontal Adjustment Screw (HAS) [2] until the 'pin' [7] in the sight glass shows
the same length as the other 'pin' [8]. If you are doing this at night (highly recommended), you will see how the light moves
up and down with the VAS [1] and left to right with the HAS [2].
When the bubble is 'level', then turn the Horizontal Adjustment Screw (HAS) [2] until the 'pin' [7] in the sight glass shows
the same length as the other 'pin' [8]. If you are doing this at night (highly recommended), you will see how the light moves
up and down with the VAS [1] and left to right with the HAS [2]. The horizontal headlight aim normally never needs to be changed unless there has been a repair to the body or if the headlight assembly has been replaced. If BOTH 'pins' show the same length AND the bubble level is 'plum', then do not make any adjustments. |
|
Adjusting S-Class Coupe Foglights The unique foglights in the S-Class coupe do not usually need adjustment b/c of the method by which they are mounted. However, if you find that they are misaligned, there is an adjustment 'screw' behind the grill facade as shown in the picture.  The foglight for the coupe is set to beam so that it fills-in the lower portion of the normal headlight pattern. It's a very
wide pattern going from about 120degs off the front beam making it brightly illuminate the side portion of the road. The
foglight pattern is also very "narrow" in height as it should be. A properly set foglamp pattern is to be aimed low since
that gives the best illumination in dense fog. If the pattern is beamed "UP", then you will be literally blinded in dense
fog.
The foglight for the coupe is set to beam so that it fills-in the lower portion of the normal headlight pattern. It's a very
wide pattern going from about 120degs off the front beam making it brightly illuminate the side portion of the road. The
foglight pattern is also very "narrow" in height as it should be. A properly set foglamp pattern is to be aimed low since
that gives the best illumination in dense fog. If the pattern is beamed "UP", then you will be literally blinded in dense
fog. The height of the foglight assy to the center of the internal lamp is about 13" from the ground. To set it properly, make sure that it is no higher than 11" - 12" on the wall 10' away. Adjustment to the beam height is made by turning the screw shown in the picture using a small Phillip's screwdriver. You will find that the adjustment range is very small but enough to ensure that the fog-beam is no higher than the starting dimension to the ground. With the headlights on low-beam, the foglight pattern should pick up where the lower portion of the low-beam pattern fades. The head- and fog-light adjustment procedure should take you about 10 minutes for each if you have done some 'homework'. The adjustments are very easy to perform and will give you more light where it's supposed to be! |
 But this is just the tip of the iceberg. Suffice to say, I did some 'homework' so I could catchup on what's new in halogen
lighting for my Mercedes coupe. There's a lot of argument but after looking over the field, I chose the Sylvania 'SilverStar'
(SS) lamps, 9003ST. They operate at a very high temperature, around 4000K, which makes the light appear very
'white' and very bright, brighter than PIAA bulbs. Also they are LEGAL (use nominally 55/65 watts) for use in the
USA and Canada unlike the ones I removed. There are a lot of lamps that MAY be better but this lamp is available
almost everywhere and the cost is reasonable, about $29 for two. Light output for the 9003ST is
910/1500 lumens with maximum wattage 65/72 watts. The bad part is that the lamp's life is relatively short
when compared to a conventional lamp.
But this is just the tip of the iceberg. Suffice to say, I did some 'homework' so I could catchup on what's new in halogen
lighting for my Mercedes coupe. There's a lot of argument but after looking over the field, I chose the Sylvania 'SilverStar'
(SS) lamps, 9003ST. They operate at a very high temperature, around 4000K, which makes the light appear very
'white' and very bright, brighter than PIAA bulbs. Also they are LEGAL (use nominally 55/65 watts) for use in the
USA and Canada unlike the ones I removed. There are a lot of lamps that MAY be better but this lamp is available
almost everywhere and the cost is reasonable, about $29 for two. Light output for the 9003ST is
910/1500 lumens with maximum wattage 65/72 watts. The bad part is that the lamp's life is relatively short
when compared to a conventional lamp.  Recently Sylvania has released on new version of their "Silverstar" lamp solution for safer night time driving, called
the SilverStar® ULTRA. These provide up to 25% increase in down road visibility, increased side road visibility
and up to a 20% brighter light, compared to standard halogen headlights. They also last up to 30 percent
longer than regular SilverStar headlights.
Recently Sylvania has released on new version of their "Silverstar" lamp solution for safer night time driving, called
the SilverStar® ULTRA. These provide up to 25% increase in down road visibility, increased side road visibility
and up to a 20% brighter light, compared to standard halogen headlights. They also last up to 30 percent
longer than regular SilverStar headlights.  The manual process involves taking measurements and aiming the light against a wall or screen. During this process, park the
car on a level floor facing a wall or screen 25 ft away. To guarantee that you can see your headlight's pattern means
that you should do this at night! First, measure the vertical distance to the geometric center of the headlights. This is
the hard part -- what is the geometric center? On some lights, there is a little molded mark to indicate this center. On
others, it will be necessary to look into the lens and judge where the center of the bulb is. Transfer this measurement to
the wall. Measure the distance between the lights. Transfer this and the center line of the vehicle to the wall. Now mark a
line 2.1 inches below the horizontal you marked on the wall.
The manual process involves taking measurements and aiming the light against a wall or screen. During this process, park the
car on a level floor facing a wall or screen 25 ft away. To guarantee that you can see your headlight's pattern means
that you should do this at night! First, measure the vertical distance to the geometric center of the headlights. This is
the hard part -- what is the geometric center? On some lights, there is a little molded mark to indicate this center. On
others, it will be necessary to look into the lens and judge where the center of the bulb is. Transfer this measurement to
the wall. Measure the distance between the lights. Transfer this and the center line of the vehicle to the wall. Now mark a
line 2.1 inches below the horizontal you marked on the wall. |
Send me |